Why a picture is not enough
A JPG or PNG is a grid of coloured squares. Design Space can upload one for free, but as a single layer: one flat picture to print and cut round, or one silhouette to cut out.
To cut each colour from its own sheet of vinyl, you need the design as shapes, with one layer for each colour. That is what an SVG is. Turning a picture into those shapes is called tracing, or vectorizing.
Design Space has its own way to do this, called Convert to Layers, which splits a picture into up to nine layers. It needs a Cricut Access subscription. If you have Access, try it first. This guide is for making the layered SVG yourself, as a file you keep and can use in any software.
What works, and what does not
- Works well: logos, clipart, lettering, cartoons and drawings with flat, clear colours.
- Works with a little cleaning up: artwork with soft shadows or gradients. Use fewer colours.
- Does not work: photographs. A photo has thousands of colours, and it traces into a patchwork of small pieces nobody wants to weed. For a photo, make a line-art stencil or a print-then-cut sticker instead.
Step by step in Tracesmith


- Choose the job. Open Tracesmith and tap Cut file. Tap Choose a picture to pick one from your photos or files, or Paste a picture if you have copied one.
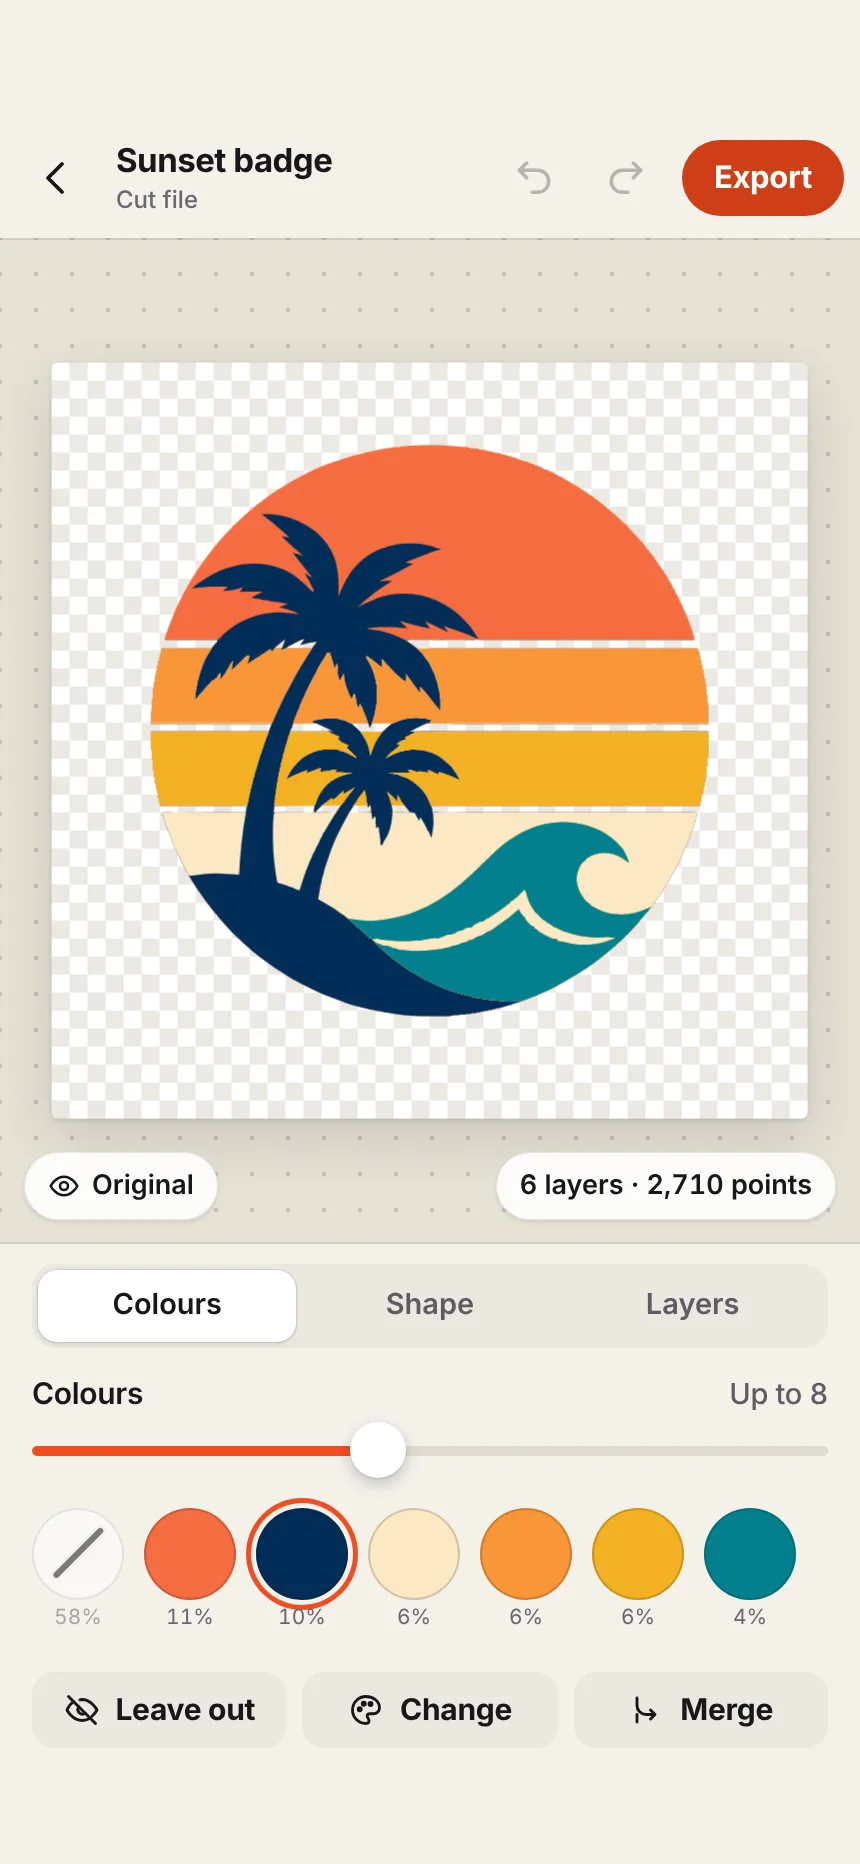
- Set the colours. The picture is traced in about a second. Under Colours, drag the slider until the design has as many colours as you have vinyl. Fewer colours means fewer layers and cleaner shapes.
- Tidy the colours. Tap a colour to Leave out (useful for a white background), Change it, or Merge it into another when two shades should be one piece.
- Tune the shapes. Under Shape, lower Detail and raise Smoothing if there are too many small pieces. Corners chooses between sharp and rounded.
- Choose how layers meet. Under Layers, Stacked runs each colour under the ones above it, so no gaps show if your layering is a hair out. Cutout cuts each colour to exactly its own shape, so the pieces sit side by side. Turn on Outline layer for a backing shape behind the whole design.
- Export. Tap Export, keep SVG, and type the finished width in inches or centimetres. Tap Save to Files.
Getting it into Design Space
- Open Cricut Design Space on the same iPhone or iPad and start a new project.
- Tap Upload, choose to browse files, and pick the SVG you saved. Uploading needs an internet connection.
- Add the uploaded design to your canvas. Each colour arrives as its own layer, already grouped.
- Check the width. It should match what you typed in Tracesmith. If you resize, keep the proportions locked so the layers stay in register.
- Tap Make. Design Space puts each colour on its own mat.
Cutting iron-on? Turn on Mirror for each mat in Design Space before you cut. Tracesmith leaves cut files the right way round on purpose, so the same file works for vinyl and for iron-on.
If something looks wrong
- Too many tiny pieces. Use fewer colours, lower Detail, and merge shades that are nearly the same.
- A colour is missing. A very small area of colour can be absorbed into its neighbour. Raise the number of colours by one or two.
- Edges look wobbly. Start from a larger or sharper picture if you can. A tiny, heavily compressed image has little edge to find.
- The background came along. Tap the background colour and choose Leave out.
Other ways to do it
If you have a computer, Inkscape is free and its Trace Bitmap tool does the same job with more manual control. There are web tools that trace on a server, usually by subscription. We set them side by side in ways to make SVG cut files on an iPhone or iPad.